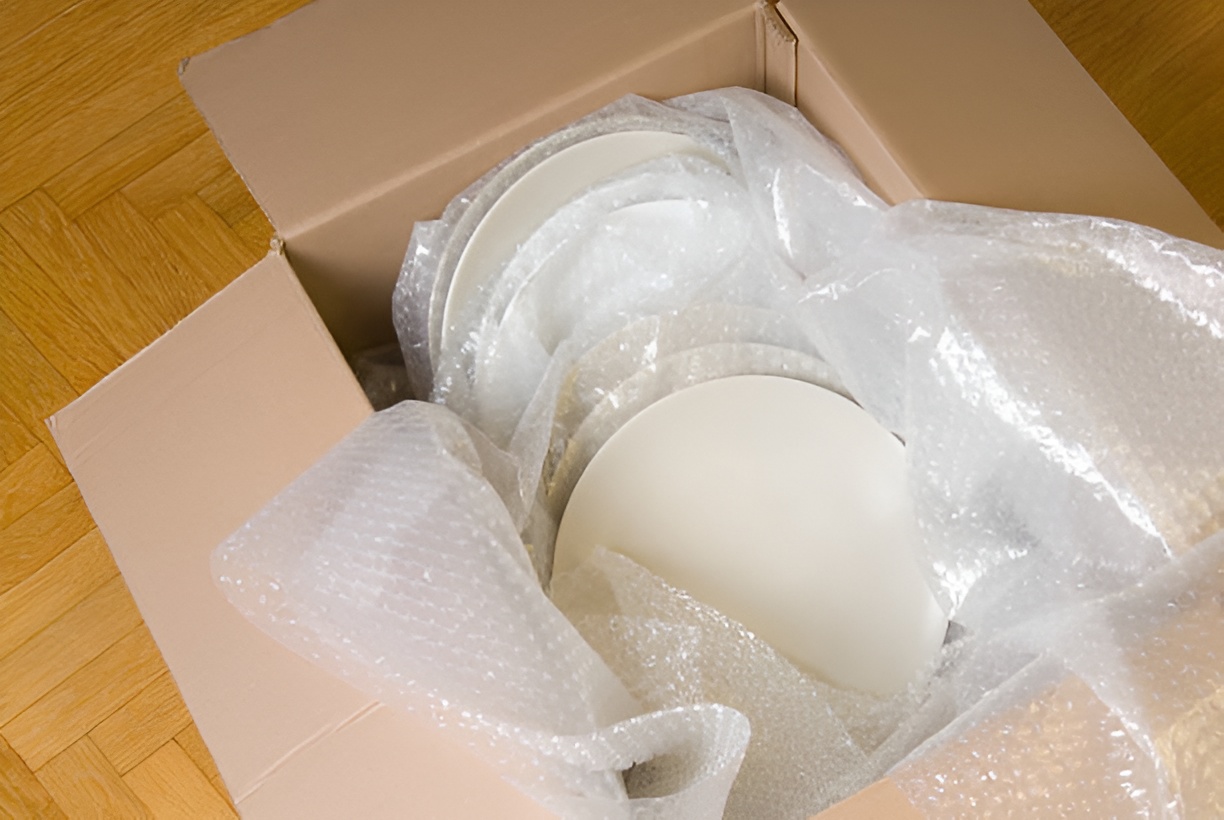

- Invest in proper packing materials: Use sturdy boxes, bubble wrap, packing paper, dish dividers, and towels to protect fragile dishes from shifting or breaking.
- Wash and dry dishes before packing: Clean, dry dishes prevent pests, mold, or mildew and make unpacking easier.
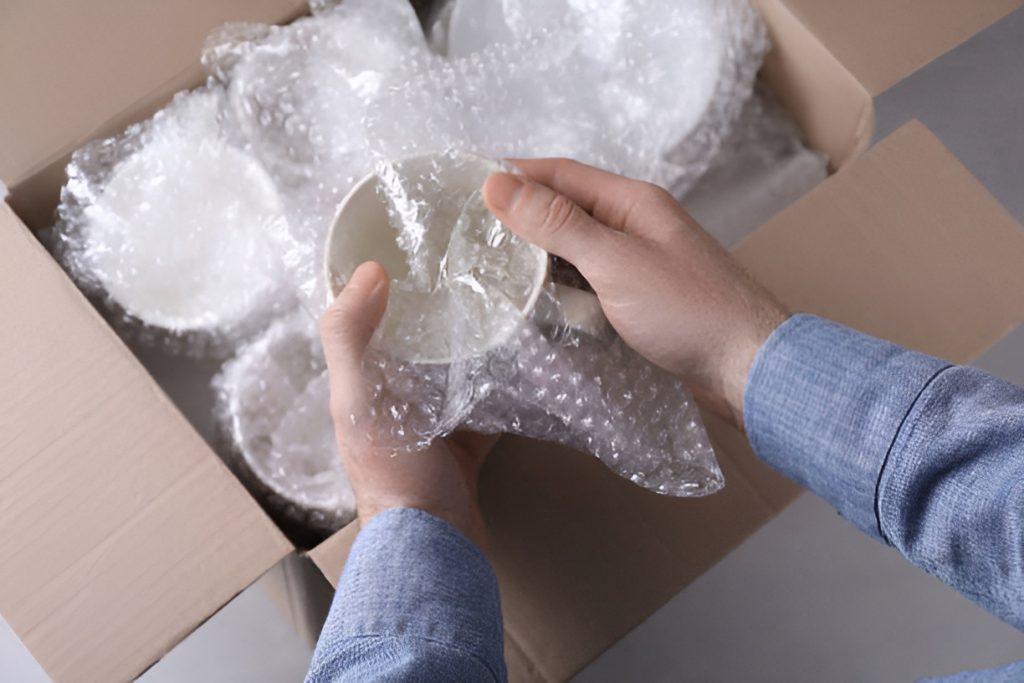
- Wrap and stack items correctly: Wrap each plate, bowl, or glass individually; stack plates vertically and nest bowls with padding between layers to prevent damage.
- Protect glassware and stemware: Wrap stems individually, use dividers, and fill empty spaces with cushioning to avoid breaks.
- Label and organize boxes: Clearly mark boxes as “Fragile” and indicate “This Side Up”; number boxes and keep an inventory to simplify unpacking.
- Use small boxes for heavy items and fill gaps: Smaller boxes reduce weight, while padding prevents dishes from shifting and breaking during transport.
- Unpack systematically and safely: Start with fragile items, remove padding slowly, inspect for damage, wash dishes, and organize similar items together for stress-free setup.
Moving is stressful enough without worrying about your dishes breaking in transit. Whether it’s your everyday plates or your grandmother’s antique china, packing dishes carefully can save you time, money, and heartache. In this guide, we’ll walk you through everything you need to know about how to pack dishes for moving safely and efficiently, from gathering supplies to unpacking at your new home.
Why Proper Dish Packing Matters
Breaking dishes during a move is far more common than many homeowners realize. Even if you drive carefully, the simple act of lifting and stacking boxes can cause plates, bowls, and glassware to chip, crack, or shatter. Proper dish packing isn’t just about avoiding a mess—it’s about protecting your investment, saving time, and reducing stress.
Here’s why it’s worth the effort:
- Prevents costly replacements: Fine china, glassware, or specialty cookware can be expensive to replace. Damaged items often cost more than the time and effort it takes to pack them properly. Even everyday dishes add up when multiple items break.
- Reduces stress during the move: Knowing your fragile items are well-packed lets you focus on other moving tasks without worrying about a pile of broken dishes waiting for you at your new home.
- Keeps fragile items intact for long-term use: Properly packed dishes are less likely to sustain damage over time, ensuring your favorite dishes, heirlooms, or collectibles remain safe for years to come.
Taking the time to pack dishes correctly may seem tedious, but it’s a worthwhile investment in peace of mind. With the right approach, packing can even be efficient and organized, leaving you confident that your kitchen essentials will arrive intact.
What Supplies Do You Need to Pack Dishes Safely?
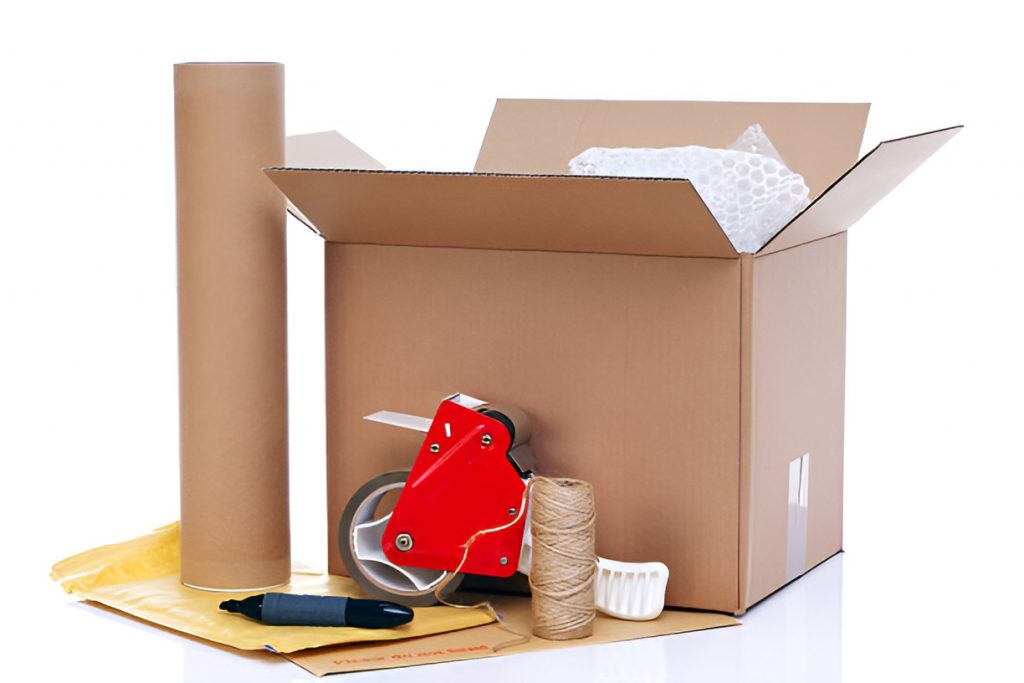
Before you touch a single plate, gather all the materials you’ll need. Being prepared prevents mistakes, speeds up packing, and ensures your dishes are well-protected. Here’s a detailed list of essentials:
- Sturdy boxes: Dish packs or small-to-medium cardboard boxes are ideal. Avoid oversized boxes, as heavy boxes can collapse under their own weight or become difficult to lift. A good rule of thumb is: the heavier the items, the smaller the box should be.
- Packing paper or newspaper: Use these to wrap each individual dish. Packing paper is preferred because it’s soft, doesn’t smudge, and protects delicate surfaces. Newspaper is acceptable, but avoid glossy pages, as ink can transfer to your dishes.
- Bubble wrap: This is crucial for extra fragile items like glassware, crystal, or collectible dishes. Bubble wrap provides cushioning and absorbs shocks that could otherwise cause cracks or breaks.
- Dish pack dividers: Optional but very helpful, dividers separate plates and glasses inside boxes, minimizing movement and reducing the chance of collisions.
- Packing tape: Choose strong, wide tape for sealing boxes securely. Reinforce the bottom and top of every box to prevent it from opening during the move.
- Markers: Use these to label boxes as “Fragile” and indicate “This Side Up.” Clear labels guide movers and reduce the risk of mishandling.
- Plastic wrap or bags: Ideal for silverware, small kitchen tools, or sets of items that could scatter inside a box.
- Towels or linens: These can double as padding, reducing movement and protecting surfaces inside boxes. Old t-shirts, kitchen towels, or even fitted sheets work perfectly.
Having all these supplies ready before you start packing will make the process smoother and faster. It also prevents you from having to pause midway to hunt for materials.
Should You Wash Dishes Before Packing?
Yes. Washing and thoroughly drying all dishes before packing is critical. Here’s why:
- Hygiene: Dirty dishes can attract pests or bacteria, which could be an unwelcome surprise at your new home.
- Moisture protection: Any remaining water can cause mold, mildew, or staining during transit.
- Ease of unpacking: Packing clean dishes means you can put them away immediately in your new kitchen, saving you extra cleanup later.
Take the time to dry everything completely. Damp dishes wrapped in paper or plastic can trap moisture and damage both the dishes and your packing materials.
How to Pack Plates for Moving Without Breaking Them
Plates are among the most common casualties during a move. Fortunately, following a careful method can protect them.
- Wrap each plate individually:
- Lay a sheet of packing paper or bubble wrap flat on a table.
- Place the plate in the center and fold the paper over, making sure all edges and surfaces are covered.
- Secure with a small piece of tape if needed.
- Stack plates vertically, not horizontally:
- Place plates on their edges inside the box, rather than stacking them flat.
- Vertical placement reduces pressure and prevents cracks caused by weight.
- Use dividers or padding between plates:
- Cardboard dividers or extra layers of paper can prevent plates from knocking against each other.
- For extra security, alternate plates with a sheet of bubble wrap or a thin layer of packing paper.
- Fill gaps with cushioning:
- Crumpled packing paper, bubble wrap, or towels can fill empty spaces in the box, keeping plates from shifting during transport.
- Small boxes are better than large boxes:
- Heavy plate boxes can become unmanageable. It’s safer to pack plates in multiple smaller boxes than in a single oversized box.
How Do You Pack Bowls Safely?
Bowls are trickier because they are often nested together, which can lead to chips if they’re packed incorrectly.
- Wrap each bowl individually: Just like plates, each bowl should have its own layer of packing paper or bubble wrap.
- Layer with padding: Place a cushioning layer at the bottom of the box to absorb any impact from handling.
- Stack slightly offset: Don’t nest bowls directly on top of each other without padding. Place paper or bubble wrap between each bowl.
- Fill empty spaces: Gaps in the box should be filled with crumpled paper, bubble wrap, or towels to prevent bowls from moving during the move.
This approach ensures that each bowl is insulated and protected from pressure or collisions.
What About Glassware and Stemware?
Glassware is highly fragile and requires extra precautions. Stemmed glasses, such as wine or champagne glasses, are particularly vulnerable.
- Wrap stems individually: Use bubble wrap around both the stem and the bowl to protect against breaks.
- Place upright in a dish pack box: Special boxes with dividers are ideal for wine glasses or other stemware. Upright placement minimizes stress on delicate stems.
- Fill empty spaces: Crumpled paper or bubble wrap should surround each glass to prevent shifting.
- Label clearly: Always mark these boxes as “Fragile” and indicate the correct side up. Movers and anyone handling the boxes will know to take extra care.
How Should You Pack Pots, Pans, and Bakeware?
Even though pots, pans, and bakeware aren’t as delicate as glass, they still need protection to prevent scratches and dents.
- Stack with padding in between: Use dish towels, oven mitts, or packing paper between each item.
- Cover lids separately: Lids can create pressure points if placed directly on top of pans. Wrap them individually or use padding to prevent damage.
- Nonstick cookware: Avoid abrasive materials that can scratch coatings. Soft towels or paper provide adequate protection.
How to Pack Mixed Kitchen Items
Your kitchen likely has a mix of dishes, mugs, utensils, and gadgets. Here’s how to handle everything safely:
- Mugs: Wrap each one individually. Place upright in boxes and add padding around handles to prevent snapping.
- Utensils: Sharp knives or tools should be wrapped in thick paper or cardboard to prevent injuries and protect other items.
- Small gadgets: Pack loosely with padding, but avoid overpacking the box, which could crush items under weight.
How Do You Label Dish Boxes?
Proper labeling ensures that your boxes are handled correctly:
- Mark boxes as “Fragile” on multiple sides: This signals movers to handle with care.
- Indicate “This Side Up”: Prevents boxes from being stored upside down, which can lead to broken items.
- Number and track boxes: Keeping an inventory helps with organization and ensures nothing gets lost during the move.
How to Pack Dishes for Moving Like a Pro: Tips and Tricks
Here are some professional tips to make sure your dishes survive the move intact:
- Use small boxes for heavy items: They are easier to lift and less likely to collapse under weight.
- Avoid overpacking boxes: Excessive weight increases the risk of damage.
- Fill all gaps with padding: Empty spaces allow items to shift and collide.
- Keep delicate items together: Don’t mix heavy objects like cast iron with fragile dishes.
- When stacking in the moving truck: Place dish boxes on top of heavier boxes to avoid crushing.
Common Mistakes to Avoid When Packing Dishes
Even experienced movers make mistakes. Here’s what to watch out for:
- Skipping padding between plates or glasses – this almost guarantees damage.
- Using oversized boxes – larger boxes can become too heavy and break under pressure.
- Stacking items horizontally – vertical stacking reduces stress on fragile items.
- Ignoring gaps in the box – items will shift and chip if spaces aren’t filled.
- Not labeling boxes – movers won’t know which boxes require careful handling.
How Long Does It Take to Pack Dishes?
Packing dishes depends on the number of items and how meticulous you are. On average:
- Small kitchen (50–75 dishes): 2–4 hours
- Medium kitchen (75–150 dishes): 4–6 hours
- Large kitchen (150+ dishes): 6–10 hours
Breaking the task into smaller sessions and having all materials ready will make the process less overwhelming.
Should You Pack Dishes Yourself or Hire Professionals?
It depends on your comfort level and budget:
- DIY packing: Gives you control, may be cheaper, but requires time and effort.
- Professional packing services: Expensive but reduces stress, especially for fragile or valuable items.
If you choose professionals, still mark boxes clearly and remove any personal labeling to ensure they handle items correctly.
How to Unpack Dishes After the Move
Unpacking your dishes safely is just as critical as packing them properly. Even if everything survived the trip intact, rushing the unpacking process can lead to broken items, scratches, or misplaced pieces. Here’s how to make sure your dishes are unpacked safely and efficiently:
- Start with the fragile boxes first: Begin by unpacking boxes labeled “Fragile” or containing glassware, stemware, and fine china. These are your most vulnerable items and should be handled before moving on to heavier or less breakable items. Doing so also prevents accidents caused by stacking heavier boxes on top of fragile ones.
- Remove padding slowly and carefully: Take your time to unwrap each dish. Remove bubble wrap, packing paper, or towels gently to avoid scratches or accidental drops. Inspect each item as you remove it to ensure there’s no hidden damage, especially if plates or glasses were stacked vertically or nested.
- Check for chips, cracks, or scratches: Even small damage can worsen over time if left unnoticed. Separate any broken or damaged items to avoid mixing them with intact dishes. You can also use this opportunity to decide if any items should be repaired, replaced, or donated.
- Wash dishes before use: Even though your dishes were clean before packing, dust, dirt, or packing residue can accumulate during transit. A quick wash ensures they’re sanitary and safe for immediate use in your kitchen.
- Organize boxes with similar items together: When unpacking, keep plates, bowls, mugs, and utensils grouped by category. This will make putting them away in cabinets or drawers much easier and faster. You can even designate specific kitchen zones in advance, so you know exactly where each type of dish should go.
- Take your time to arrange cabinets and drawers: Don’t rush to store dishes in their final spots if your kitchen layout isn’t ready. Use a temporary area to safely set fragile items while finishing unpacking, ensuring you don’t accidentally knock anything over in the process.
How Can You Make the Process Less Stressful?
Packing and unpacking dishes can be overwhelming if not approached systematically. By planning ahead and working efficiently, you can minimize stress and ensure a smoother move:
- Create a packing plan weeks in advance: Map out which items will go first, what materials you’ll need, and how many boxes to prepare. For dishes, plan for extra padding and smaller boxes, and schedule time to wrap items carefully. Planning ahead prevents last-minute scrambling and reduces the risk of damage.
- Work systematically, one type of item at a time: Start with plates, then bowls, mugs, glassware, and finally utensils or gadgets. This prevents clutter and ensures that each type of dish is packed or unpacked with the right technique. It also makes labeling easier and helps you track inventory.
- Enlist help from friends or family: Wrapping fragile dishes and moving heavy boxes is much easier with extra hands. Assign specific tasks, like wrapping, padding, or carrying boxes, to make the process faster and safer. Two sets of eyes also help catch mistakes you might miss.
- Use checklists to stay organized: Keep a running list of what’s been packed, what’s ready to move, and what still needs attention. You can also track fragile items, special kitchen tools, and collectible dishes to ensure everything makes it safely to your new home. Checklists reduce the likelihood of forgetting items and give you a sense of progress during the move.
- Schedule breaks during the process: Don’t try to pack or unpack everything in one go. Fatigue increases the chance of accidents. Set realistic goals for each session and reward yourself when completed. A few short, focused packing or unpacking sessions are far more effective than trying to do it all at once.
- Label and stage boxes strategically: Place fragile boxes in an area that’s easily accessible at your new home. This avoids carrying them through cluttered hallways or stairs, reducing the risk of dropping something valuable.
By taking a methodical, organized approach, unpacking dishes doesn’t have to be stressful. With careful planning and a few strategic steps, you can protect your kitchenware and enjoy a smooth transition into your new home.
Final Thoughts
Moving doesn’t have to mean broken plates and chipped glasses. With the right materials, techniques, and a bit of patience, you can transport your kitchen items safely and efficiently. By following this guide on how to pack dishes for moving, you’ll save time, avoid stress, and ensure your dishes arrive at your new home in perfect condition.
Remember, careful planning and methodical packing are key. Your dishes are more than just kitchenware—they’re part of your home’s memories. Treat them with care, and they’ll make the journey safely with you.